This Mother's Day, a husband goes the extra mile - or rather, redirects the water line - to plant a fig tree for his wife, just like Odysseus on a quest for love. With four 90-degree angles and a few (dozen) potential leaks, this labor of love is sure to be a plumbing nightmare for years to come. Future generations may curse or praise this epic feat of devotion.
Get ready for a 5-day adventure of a lifetime! This trip starts off with a bang, tackling Timber Gap and Black Rock Pass in the first two days, but don't worry, it gets easier from there. Enjoy breathtaking views, picturesque lakes, and scenic meadows as you make your way through the stunning landscape.
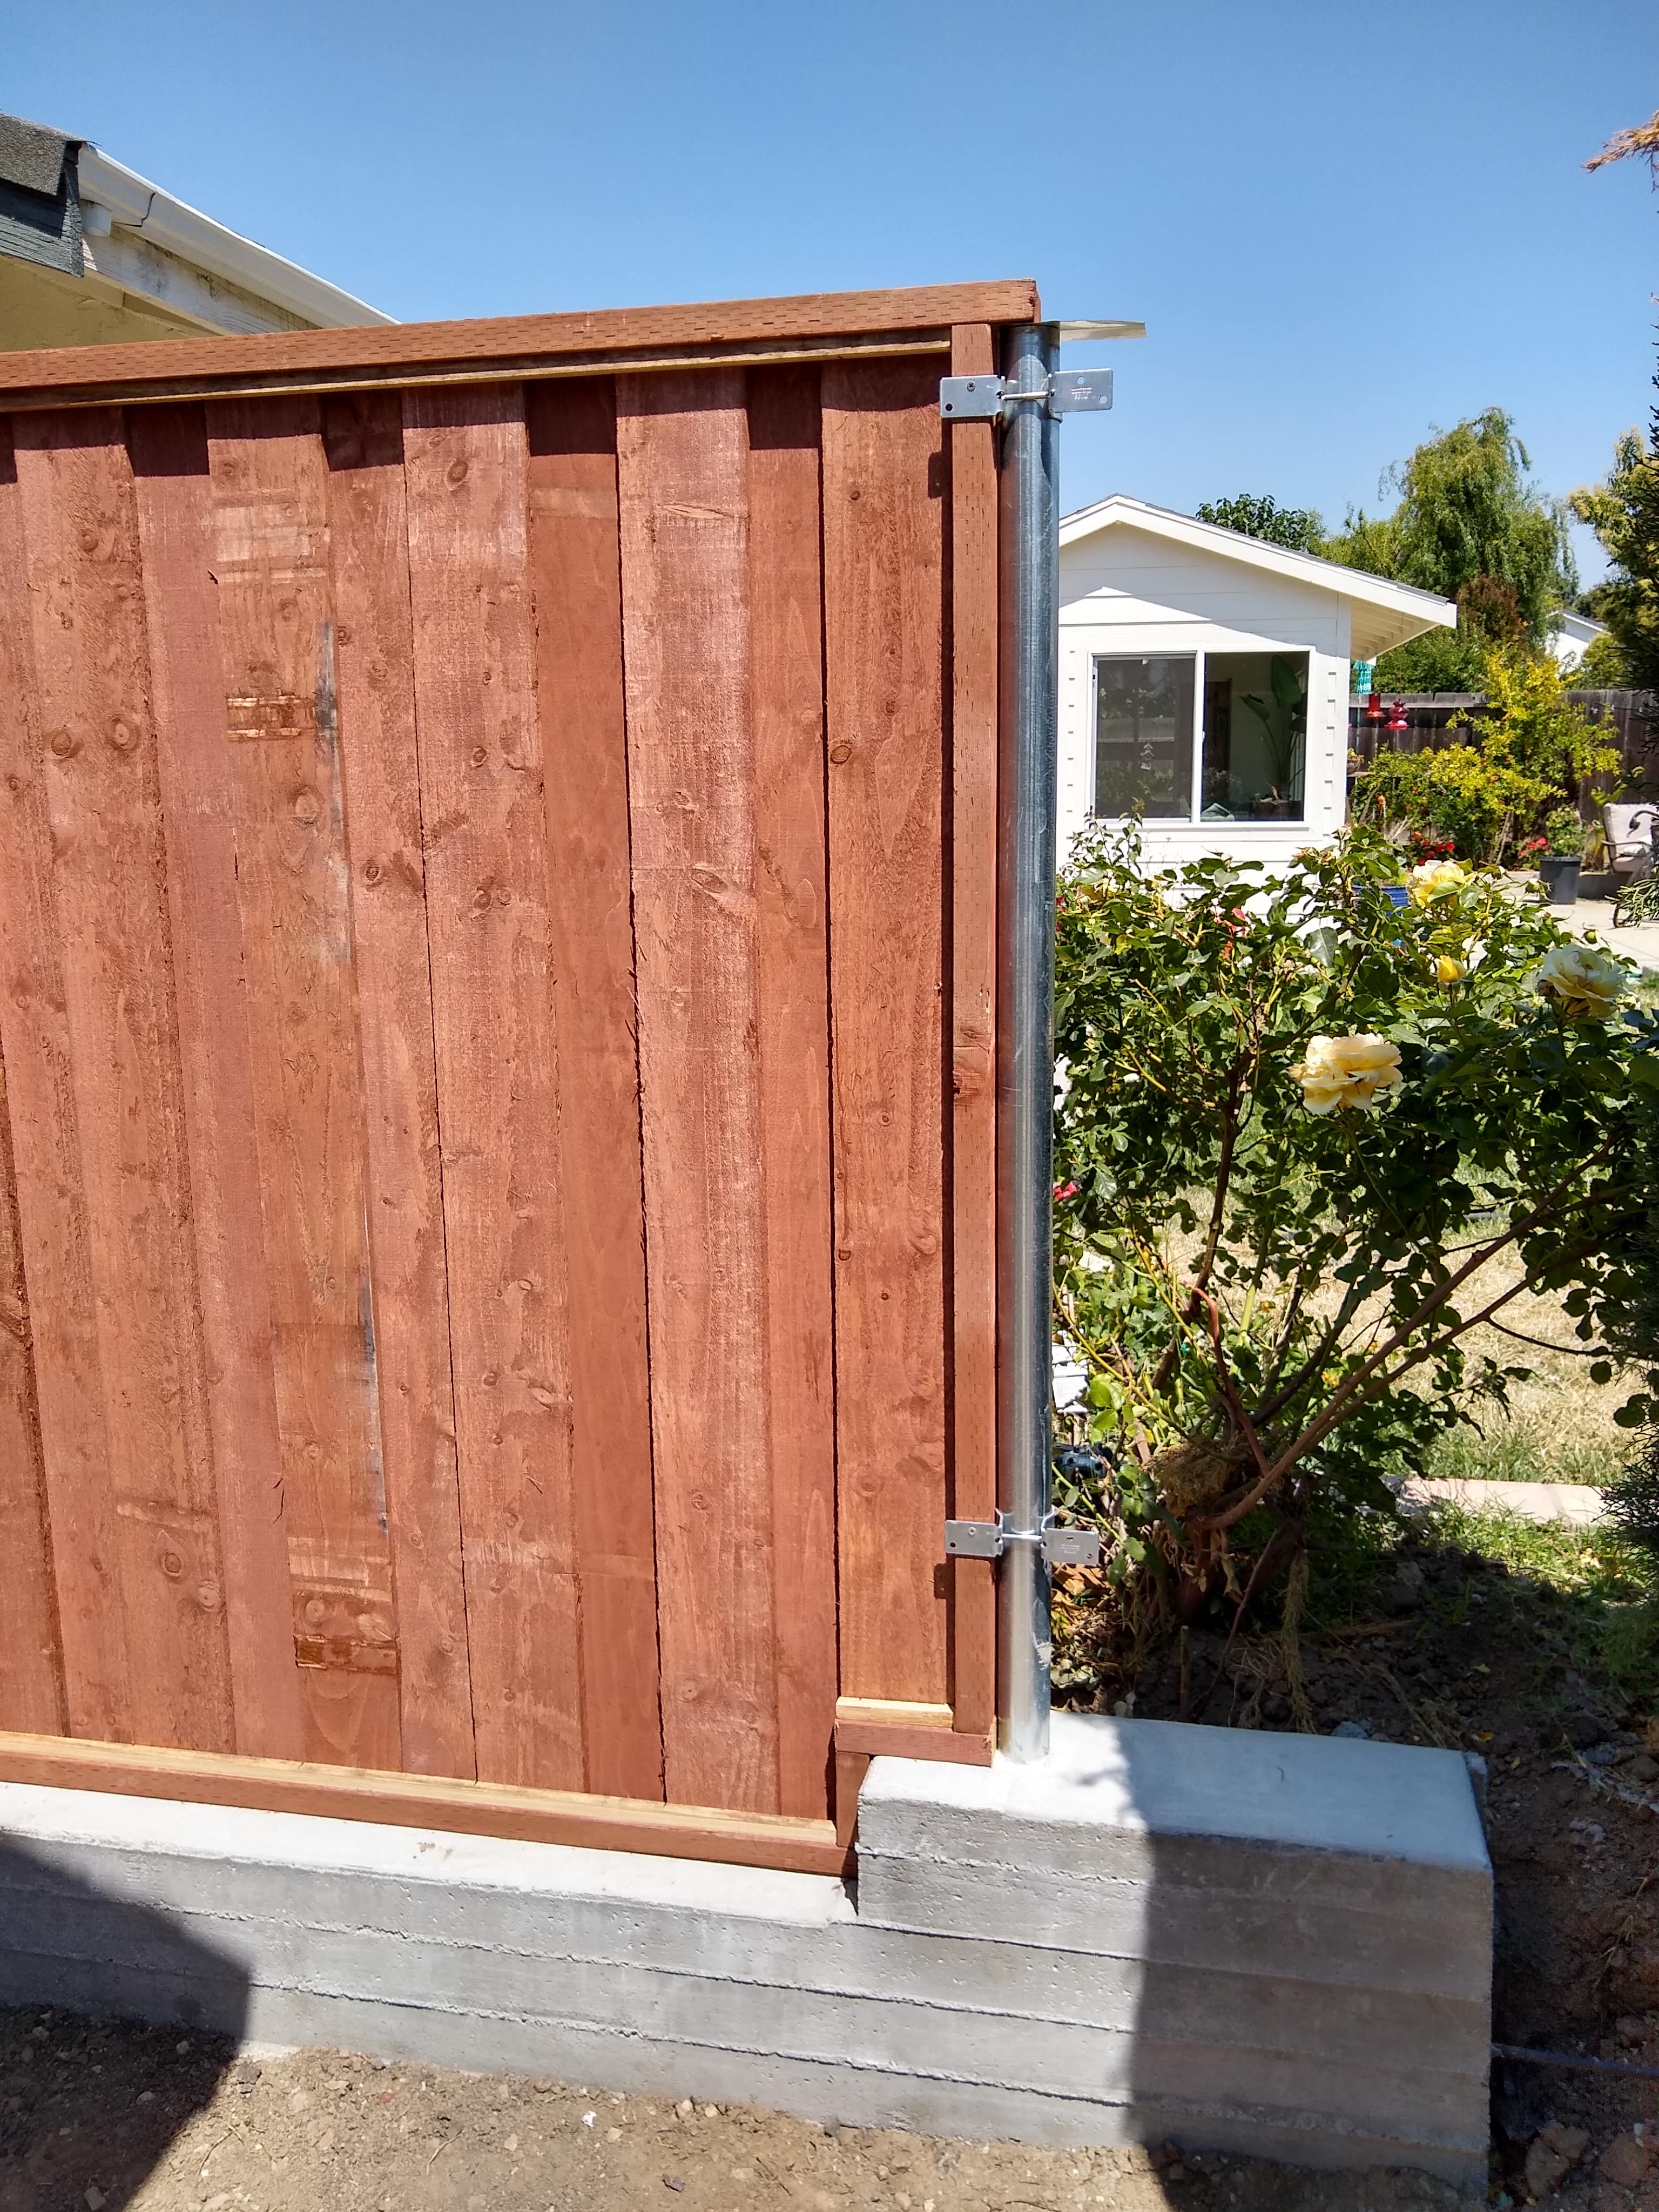
Tired of replacing your wooden fence every 10 years? A clever DIY project combines the best of wood and steel to create a durable, long-lasting fence that should outlast traditional all-wood construction by decades. This hybrid design is not only practical but also cost-effective and visually appealing.
A visual journey through March 2018, showcasing the dramatic contrast between San Jose's blooming hills and the snow-covered Sierra mountains, all captured within just three weeks.
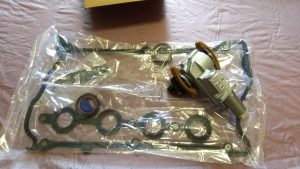
Replacing the variable timing solenoid on a 2001 Audi V6 is a relatively simple process that requires patience and attention to detail. The replacement kit from Parts Geek includes all necessary gaskets and a special tool to keep the timing solenoid compressed during removal and installation. By following the steps outlined, including marking the camshaft and timing chain positions, removing the camshaft towers, and compressing the old solenoid, you can complete the replacement in about an hour.